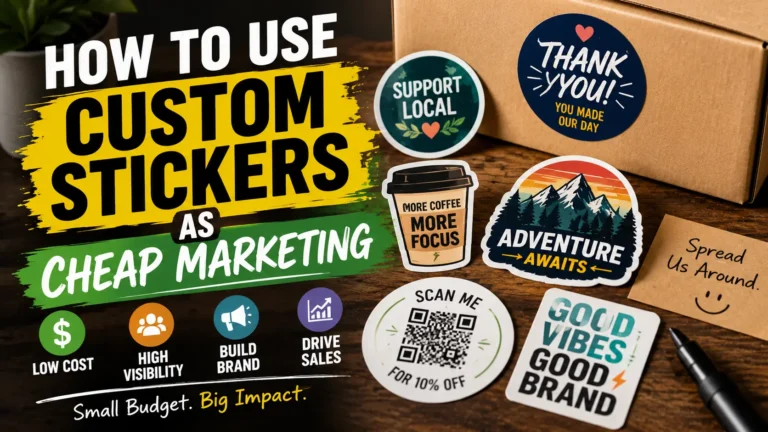
How To Use Custom Stickers As Cheap Marketing

TLDR

Custom stickers work well as cheap marketing because they are small, useful, easy to hand out, and simple to add to packaging, events, local promos, and customer orders. The best sticker marketing ideas are not random freebies. They connect to a clear goal: brand awareness, repeat purchases, referrals, social follows, reviews, or local visibility.

Start with a simple design, a clear message, and one easy next step. Then use stickers in places customers already touch: packaging, receipts, bags, laptops, bottles, mailers, storefronts, events, and product displays.

Introduction

Most small businesses do not have money to waste on ads that disappear the second the budget turns off. That is why cheap marketing has to work a little harder. It needs to be memorable, easy to use, and tied to a real customer action.

That is where learning how to use custom stickers as cheap marketing makes sense. Stickers are simple, but they can do a lot of jobs. They can turn plain packaging into branded packaging. They can make a customer order feel more personal. They can put your logo on a laptop, water bottle, hard hat, cooler, notebook, car window, or checkout counter. And with the right design, they can give people a small reason to remember your business.

The trick is not just ordering logo stickers and hoping people use them. That can work, but it leaves a lot on the table. A better approach is to treat custom stickers like tiny marketing pieces with a purpose. Some should build brand awareness. Some should promote a discount. Some should send people to a landing page. Some should make your packaging look more finished without paying for custom boxes.

Here is how to use custom stickers as cheap marketing without making them feel cheap.

Why Custom Stickers Work For Low-Cost Marketing

Stickers work because people understand them instantly. There is no learning curve. No app to download. No account to create. A sticker can be handed out, packed into an order, placed on a product, stuck to a bag, or given away at an event.

They also last longer than many one-time marketing pieces. A social post may get buried. A flyer may get tossed. A sticker that someone actually likes can stay on a laptop or bottle for months. That is not guaranteed, of course. A boring sticker still becomes clutter. But a useful, funny, attractive, or well-branded sticker has a better shot at sticking around.

Custom stickers are also flexible. A coffee shop can use them as cup seals. A boutique can add them to shopping bags. A lawn care company can hand out weatherproof logo stickers. A creator can sell sticker packs. A local service business can add a QR code sticker to estimate folders, magnets, or leave-behind cards.

For small businesses, that flexibility is the point. You are not locked into one campaign style.

Start With One Marketing Goal

Before designing anything, decide what the sticker is supposed to do.

A custom sticker can help with several marketing goals, but one sticker should usually focus on one main job. If you try to make it do everything, it gets crowded fast.

Common sticker marketing goals include:

  • building brand awareness
  • encouraging repeat purchases
  • driving traffic to a website
  • promoting a local event
  • getting more reviews
  • encouraging social follows
  • making packaging feel more polished
  • turning customers into small brand advocates
  • adding a coupon or referral offer
  • making products easier to recognize

A logo sticker is good for brand awareness. A QR code sticker is good for traffic, reviews, menus, or signups. A packaging sticker is good for presentation. A funny brand sticker is good for shareability. A coupon sticker is good for repeat purchases.

That sounds obvious, but it matters. The goal changes the design.

Use Logo Stickers For Simple Brand Awareness

Logo stickers are the most basic form of sticker marketing, and they still work when the logo is clean and recognizable.

The best logo stickers are simple. They use strong contrast, readable text, and a shape that fits the brand. A coffee shop might use a round logo sticker. A mechanic might use a bold rectangle or shield shape. An outdoor brand might use a die-cut mountain logo. A bakery might use a soft oval or circle.

Logo stickers work well as:

  • checkout freebies
  • thank-you inserts
  • laptop stickers
  • water bottle stickers
  • event table giveaways
  • order packaging extras
  • local business cross-promos

The mistake is printing a tiny, detailed logo with text nobody can read. If the sticker is smaller than three inches, simplify the design. Remove the tagline if needed. Use a strong icon. Make the business name readable from at least a few feet away.

A sticker that looks good from across a room is usually better marketing than one that only looks good up close.

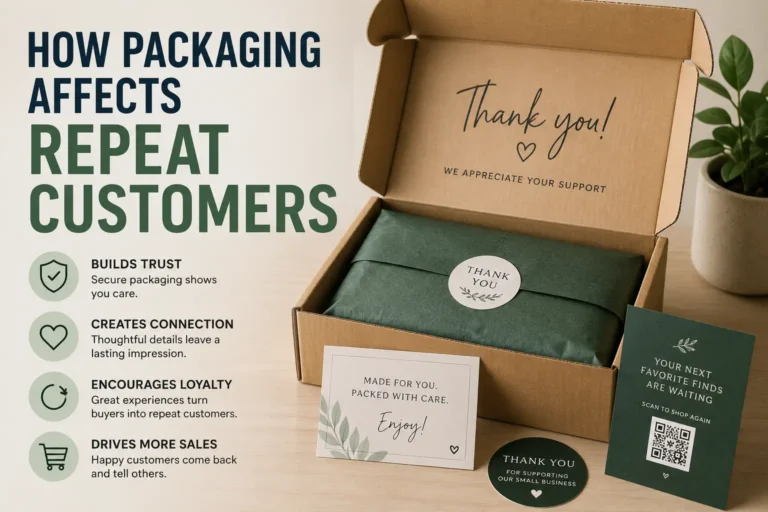
Turn Packaging Into Advertising

Packaging is one of the easiest places to use custom stickers as cheap marketing because you are already sending the package, bag, box, or product to the customer.

A sticker can make plain packaging look branded without paying for custom-printed boxes, bags, or mailers. That is useful for small businesses, Etsy sellers, local shops, subscription boxes, bakeries, candle brands, soap makers, coffee roasters, and online stores.

Good packaging sticker ideas include:

  • logo seals for tissue paper
  • thank-you stickers on mailers
  • product label stickers
  • “made locally” stickers
  • seasonal packaging stickers
  • reorder QR code stickers
  • care instruction stickers
  • batch number or flavor stickers
  • small “packed by” stickers

This is where stickers and labels can overlap. Individual stickers are great for inserts, handouts, and freebies. Roll labels are often better when you need to label lots of jars, bottles, boxes, bags, or product containers quickly. YouStickers has both custom stickers and custom labels, which makes it easier to choose based on the actual job.

The practical rule is simple: use stickers when people will receive them individually. Use labels when you need a cleaner packaging workflow.

Add QR Code Stickers With A Real Reason To Scan

QR code stickers can be very useful, but only when the scan leads somewhere worthwhile.

Do not put a QR code on a sticker just because it feels modern. Give people a reason to scan it.

Good QR code sticker destinations include:

  • a reorder page
  • a review page
  • a discount landing page
  • a menu
  • a booking page
  • a loyalty signup
  • a product care guide
  • a video tutorial
  • a social profile
  • a giveaway entry page

For example, a coffee brand could add a QR sticker that says “Scan for 10% off your next bag.” A detail shop could use a sticker that says “Scan to book your next wash.” A candle brand could add “Scan for burn care tips.” A local restaurant could place a QR sticker on takeout bags that points to the online ordering page.

The sticker should make the next step clear. “Scan me” is weak. “Scan for reorder discount” is better. “Scan to book your next appointment” is better still.

Also, test the code before printing. Make sure the QR code is large enough, high contrast, and linked to a mobile-friendly page. A QR code sticker that does not scan is not marketing. It is just a small square of regret.

Use Stickers As Customer Giveaways

Giveaway stickers work best when people would actually want to use them.

That does not always mean putting your logo front and center. In many cases, a sticker based on your customer’s identity or interest will get more use than a plain logo.

A gym could print stickers that say “Earned, Not Given.” A plant shop could make “Proud Plant Parent” stickers. A coffee shop could use “Fueled By Cold Brew.” A dog groomer could make breed-themed stickers. A bike shop could print trail, mountain, or local landmark stickers.

The business can still be present, but it should not overpower the design. A small logo or website on the edge is often enough.

Here is a good test: would someone put this on their water bottle if they did not own the business?

If the answer is no, revise the design.

Create Sticker Offers That Bring People Back

Stickers can also work as low-cost coupon cards, especially for local businesses.

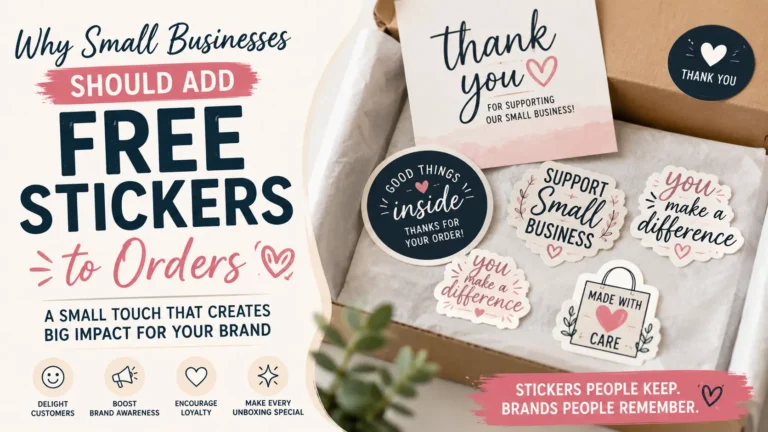
A sticker coupon feels a little more fun than a plain paper coupon. It can go on a receipt, takeout bag, box, drink sleeve, product package, or checkout counter.

Simple sticker offer ideas:

  • “Bring this back for 10% off”
  • “Scan for your next order discount”
  • “Free drink with your next visit”
  • “Show this sticker for a small bonus”
  • “Refer a friend and both save”
  • “Collect five stickers, get a reward”

For restaurants, coffee shops, salons, fitness studios, local retailers, and service businesses, this can create a simple repeat-visit loop.

Just keep the offer clear. Do not bury the details in tiny text. If there are conditions, make them simple. A confusing offer usually gets ignored.

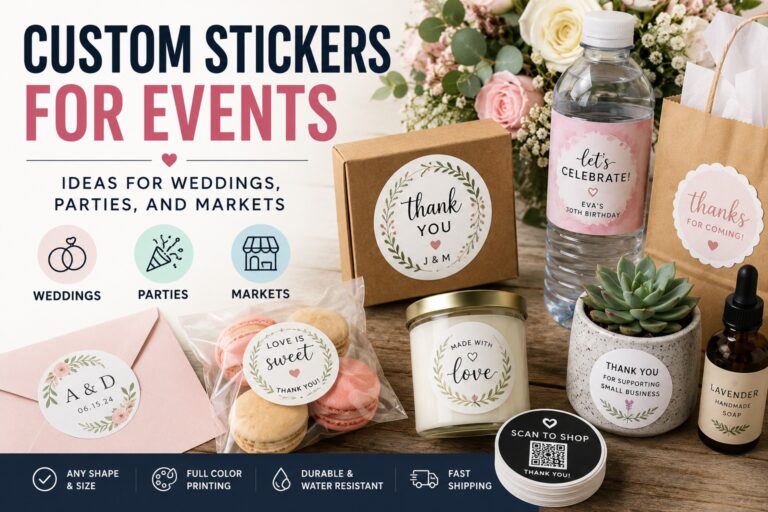
Use Stickers For Events, Markets, And Pop-Ups

Events are a natural fit for sticker marketing because people are already collecting small items, talking to vendors, and carrying bags.

At a farmers market, art fair, trade show, school event, car meet, festival, or pop-up shop, stickers give people something to take with them. They also make your booth look more active.

Good event sticker ideas include:

  • logo stickers
  • local landmark stickers
  • event-only stickers
  • limited colorway stickers
  • QR code stickers for signups
  • “I visited” stickers
  • product category stickers
  • funny niche stickers tied to your audience

Limited designs can work well here. A sticker that says “Spring Market 2026” or “Park City Coffee Run” feels tied to a moment. People like items that feel specific.

The key is to put the sticker somewhere easy to grab. Do not make people ask unless the sticker is part of a conversation. A small bowl, tray, or sign that says “Take One” is enough.

Partner With Other Local Businesses

One of the cheapest ways to stretch a sticker campaign is to share it with another business that serves a similar audience.

A coffee shop and a bookstore can create a shared sticker. A gym and a smoothie shop can cross-promote. A dog groomer and a pet supply store can team up. A local brewery and food truck can create a limited sticker for a weekend event.

The design should make sense for both businesses. It should not look like two logos fighting for space.

A good local collaboration sticker might include:

  • one shared theme
  • both logos in small form
  • a location name
  • a date or campaign name
  • a QR code to a landing page or offer

Local sticker marketing works because it feels more personal than a generic ad. It also gives both businesses something to post online and hand out in person.

Make Stickers Easy To Share On Social Media

Custom stickers can help with social content, but the sticker needs to be photogenic or connected to a reason to post.

For example, a restaurant could create a sticker wall. A boutique could include a seasonal sticker in every order and ask customers to tag the shop. A creator could sell sticker packs and encourage collectors to share where they placed them. A gym could use stickers as milestone rewards.

Good social sticker prompts include:

  • “Tag us where you stick it”
  • “Show us your bottle”
  • “Post your sticker wall”
  • “Collect the full set”
  • “Share your setup”
  • “Vote for next month’s design”

Keep the ask small. Customers are not your marketing department. But some people enjoy sharing if the sticker is genuinely fun or visually interesting.

Choose The Right Sticker Type For The Campaign

Not every marketing sticker needs the same format.

Here is a simple guide:

Marketing UseBest Sticker TypeWhy It Works
Handouts and freebiesDie-cut vinyl stickersEasy to give away and more memorable than a plain square
Packaging sealsRoll labels or kiss-cut stickersFaster to apply and clean on boxes, bags, or tissue
QR code campaignsSquare or rectangle stickersGives the code and call-to-action room to breathe
Outdoor promosLaminated vinyl or bumper stickersBetter for cars, tools, coolers, windows, and equipment
Product packagingRoll labelsEasier for repeated application on jars, bottles, bags, and boxes
Artist merchSticker sheets or sticker packsLets customers get multiple designs at once
Premium promosHolographic or specialty stickersAdds visual interest when the design supports it

For most small business marketing, vinyl stickers are the safe all-around choice. They work for handouts, packaging inserts, laptops, bottles, and general branding. Roll labels make more sense when speed and repeated application matter.

Keep The Design Simple

A cheap marketing sticker should not look rushed. It should look clear.

That usually means fewer elements, stronger contrast, and one obvious message. Small stickers do not have much space for extra copy.

A good sticker design usually includes:

  • a clear logo, icon, or phrase
  • readable text
  • strong color contrast
  • one main message
  • enough white space
  • a simple border or cutline
  • a website, handle, or QR code if needed

Avoid tiny taglines, thin fonts, crowded layouts, low-resolution artwork, and complicated backgrounds behind text. Those details may look fine on a large screen and then fall apart in print.

The best small business sticker designs are often the simplest ones.

Track The Campaign So You Know What Worked

Cheap marketing is still marketing. It should be measured.

You do not need a complicated dashboard, but you should track enough to know if the campaign was worth repeating.

Simple ways to track sticker marketing:

  • use a unique QR code
  • create a sticker-only discount code
  • use a landing page for the campaign
  • ask customers how they heard about you
  • count redeemed stickers or coupons
  • compare repeat orders before and after the campaign
  • track event signups from a sticker QR code

Even rough tracking is better than guessing. If a sticker campaign gets repeat orders, review scans, social tags, or local attention, you can print more. If it does nothing, adjust the design, offer, placement, or audience.

A Simple Sticker Marketing Plan For Small Businesses

Here is a practical starter plan.

First, print one brand sticker. Keep it clean, readable, and easy to use on a laptop or water bottle.

Second, print one packaging sticker. Use it on every order, bag, box, or mailer.

Third, print one action sticker. This could be a QR code for reviews, reorders, social follows, or a discount.

Fourth, test the stickers for 30 to 60 days. Track redemptions, scans, customer comments, and social posts.

Fifth, reorder the winner and retire the one that does not work.

This keeps the campaign simple. It also prevents the common mistake of ordering ten designs before knowing what customers actually respond to.

Common Mistakes To Avoid

Do not make the sticker only about you. A giant logo can work for strong brands, but many small businesses get better use from designs customers actually want to display.

Do not make the text too small. If people need to squint, the sticker is doing too much.

Do not use weak contrast. Light gray on white may look clean on screen, but it is usually a bad idea for small printed marketing.

Do not send every sticker to the same place. Packaging stickers, event stickers, coupon stickers, and QR code stickers should have different jobs.

Do not skip the proof. A proof gives you a chance to catch sizing, cutline, spacing, and layout issues before printing. That small review step matters.

Conclusion

Custom stickers can be cheap marketing, but they work best when they are treated like a real campaign. Give each sticker one job. Make the design clear. Put the sticker where customers already interact with your brand. Then track what happens.

A small sticker can build awareness, improve packaging, promote an offer, start a conversation, or bring someone back to your website. It does not need to be complicated. It just needs to be useful, readable, and tied to a next step.

For small businesses, that is the real value. Custom stickers are easy to test, easy to hand out, and easy to repeat when something works.

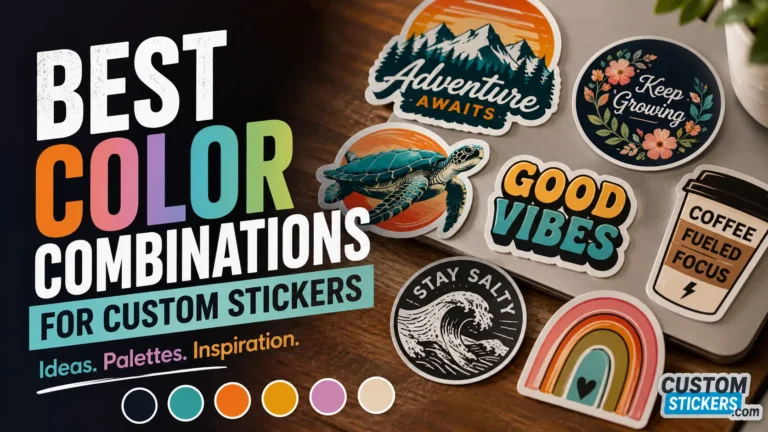
Best Color Combinations For Custom Stickers

TLDR

The best color combinations for custom stickers usually have strong contrast, a simple palette, and a clear job. Black and white works almost anywhere. Navy and cream feels polished. Teal and orange pops. Pastels work well for soft branding, but they need darker text or a strong outline. For small stickers, readability matters more than using every brand color at once.

Introduction

A sticker only gets a second or two to do its job. It might be on a laptop, a water bottle, a shipping box, a car window, or a product label. If the colors are too close together, the design can disappear before anyone has a chance to care.

That is why the best color combinations for custom stickers are not just “pretty.” They are practical. A good sticker color palette makes the artwork easy to read, easy to recognize, and easy to remember. The right mix of contrast, brand colors, background color, and finish can make a simple design feel much more intentional.

Color also changes depending on where the sticker goes. A cream sticker on a white bottle may look too soft. A black sticker on a tinted car window may not have enough edge. A neon palette can look great for a gym bottle but feel loud on luxury packaging. None of these choices are automatically wrong. They just need to match the sticker’s purpose.

Here are the best color combinations for custom stickers, plus simple ways to choose the right palette for your design.

Start With Contrast Before Picking Colors

The first rule is simple: people need to see the design.

Contrast is the difference between light and dark areas in your sticker design. It matters even more than hue. Red and green may be different colors, but if both are the same brightness, they can blur together at small sizes. Navy and white, on the other hand, are easy to read because the light-dark contrast is strong.

For sticker design, contrast affects:

  • text readability
  • logo visibility
  • QR code scanning
  • product label clarity
  • how well the sticker stands out from the surface behind it

A good quick test is to turn the design grayscale. If the main text, logo, or icon still stands out, the color combination probably has enough value contrast. If everything turns into the same middle gray, the sticker may need a lighter background, darker text, a bolder outline, or fewer colors.

This is especially important for small custom stickers. A 2-inch logo sticker does not have much room to recover from weak contrast.

Best High-Contrast Color Combinations For Custom Stickers

High-contrast palettes are the safest choice when the sticker needs to be read quickly. These work well for brand stickers, event stickers, warning labels, packaging seals, QR code stickers, and laptop decals.

Black And White

Black and white is the most reliable sticker color combination. It works because the contrast is obvious, the design stays clean, and the palette does not fight with the surface.

Use black and white for:

  • logo stickers
  • minimal brand decals
  • QR code stickers
  • typography stickers
  • product seals
  • monochrome artwork

The tradeoff is personality. Black and white can look polished, but it can also feel plain if the artwork itself is not strong. If the design feels too flat, add one accent color.

Good accent options include red, cobalt blue, lime green, metallic gold, or warm beige.

Navy And Cream

Navy and cream is a great choice when black and white feels too stark. It has enough contrast for readability but feels softer and more refined.

This palette works well for:

  • coffee brands
  • candle labels
  • wedding stickers
  • stationery brands
  • boutique packaging
  • outdoor brands that want a classic feel

Navy also prints with a rich, dependable look. Cream adds warmth without going full yellow. Just make sure the cream is not too close to white if the sticker will be used on white packaging.

Red And White

Red and white is bold, fast, and easy to notice. It works well when you want the sticker to feel urgent, energetic, or promotional.

Use red and white for:

  • sale stickers
  • event badges
  • food packaging
  • sports stickers
  • limited-edition drops
  • callout labels

The main caution is category meaning. Red can feel exciting, but it can also suggest warning, heat, error, or urgency. That can be perfect for hot sauce. It may not be right for a calming skincare label.

Yellow And Black

Yellow and black is one of the strongest high-visibility combinations. It reads quickly and works well from a distance.

Use yellow and black for:

  • safety-style stickers
  • gym stickers
  • tool stickers
  • garage decals
  • bold event stickers
  • playful warning labels

This palette is not subtle. That is the point. Use it when attention matters more than softness.

Royal Blue And White

Royal blue and white feels bright, clean, and dependable. It is a strong option for business stickers, tech brands, school stickers, and service companies.

Use this palette when you want something more colorful than black and white, but still easy to read. It also works nicely on clear stickers if white ink is used behind the blue or white areas where needed.

Best Bright Color Combinations That Pop

Bright color combinations are useful when the sticker needs to stand out on a crowded laptop, cooler, bottle, or product display. The trick is to control the palette. Bright does not mean every color should compete at once.

Teal And Orange

Teal and orange is a classic complementary color combination. The colors sit across from each other on the color wheel, so they create natural contrast.

This palette works well for:

  • outdoor stickers
  • surf and beach designs
  • summer product packaging
  • brewery stickers
  • coffee shop merch
  • event giveaways

For a cleaner look, use deep teal as the main color and orange as the accent. For a louder design, reverse it and use orange as the background.

Purple And Yellow

Purple and yellow can feel playful, creative, and eye-catching. It works well for art brands, party stickers, school stickers, music events, and youth-focused products.

The key is choosing the right shades. Deep violet with soft butter yellow feels polished. Bright purple with bright yellow feels much louder. Both can work, but they do different jobs.

A simple formula:

  • deep purple background
  • warm yellow headline or icon
  • white or cream secondary text

That keeps the design readable without making it look chaotic.

Hot Pink And Black

Hot pink and black is bold, modern, and hard to miss. It works well for stickers with attitude: fashion brands, beauty brands, band stickers, pop culture designs, and personal laptop decals.

The risk is that it can feel harsh if both colors are too heavy. Give the layout enough breathing room. Use black for structure and hot pink for impact.

Lime Green And Navy

Lime green and navy is a strong choice for fitness brands, tech brands, gaming stickers, and modern product packaging. Navy keeps the palette grounded. Lime green gives it energy.

This is a good example of a bright color combination that still feels controlled. It is colorful, but not messy.

Best Soft And Pastel Sticker Color Palettes

Pastels can look friendly, handmade, calm, or cheerful. They are great for stickers that need a lighter touch. But pastel palettes need extra care because low contrast can make small text hard to read.

Blush Pink And Cream

Blush pink and cream works well for beauty brands, bakery stickers, bridal stickers, and handmade product packaging. It feels soft and personal.

But avoid cream text on blush if the sticker includes small details. Use charcoal, deep brown, burgundy, or dark rose for the text.

A good version:

  • blush pink background
  • deep brown or burgundy text
  • cream border or small accents

Mint Green And White

Mint green and white is clean, fresh, and light. It works well for wellness brands, spring stickers, skincare labels, and food packaging.

The issue is contrast. White text on mint green often looks nice on screen but becomes faint in print. A better version is mint green with dark green, charcoal, navy, or deep teal text.

Lavender And Deep Purple

Lavender and deep purple is one of the best soft color combinations because it keeps the gentle pastel feel while adding enough contrast. It works for stationery, bookish stickers, event stickers, and creative brands.

Use lavender as the base and deep purple for the message. Add white only as an accent, not as the main text color.

Peach And Forest Green

Peach and forest green feels warm, fresh, and slightly earthy. It is a strong fit for plant shops, markets, soap brands, coffee packaging, and boutique product labels.

This palette works because peach brings warmth while forest green adds contrast and structure.

Best Color Combinations For Brand Stickers

Brand stickers need more discipline than personal stickers. A random palette may look fun, but it can weaken recognition if it does not connect back to the brand.

For brand stickers, start with your primary brand color. Then choose one of these supporting structures.

Primary Brand Color Plus White

This is the cleanest option. Use your main brand color as the background and white for the logo or text.

Best for:

  • simple logo decals
  • packaging stickers
  • thank-you stickers
  • event handouts
  • product inserts

This works especially well when your brand color is dark or saturated, such as navy, forest green, burgundy, black, or royal blue.

Primary Brand Color Plus Neutral Plus Accent

This is often the best setup for marketing stickers. Use the brand color for recognition, a neutral for readability, and one accent color for emphasis.

Example:

  • navy background
  • cream text
  • orange “new” badge

Or:

  • forest green background
  • white logo
  • gold accent line

This lets the sticker feel branded without looking flat.

Monochrome Brand Palette

A monochrome palette uses different tints and shades of one color. It can look very polished, especially for premium packaging, wedding stickers, and minimalist brands.

Examples:

  • deep green, sage, pale mint
  • burgundy, dusty rose, blush
  • navy, slate blue, pale blue
  • charcoal, gray, silver

The tradeoff is contrast. Monochrome palettes need one clearly dark shade and one clearly light shade, or the sticker can become hard to read.

Best Color Combinations By Sticker Use

The best palette depends on where the sticker will go. Here are practical combinations by use case.

Sticker UseStrong Color CombinationsWhy It Works
Laptop stickersBlack and white, hot pink and black, teal and orangeStands out on silver, black, and colored laptop cases
Water bottle stickersNavy and white, teal and orange, lime green and navyReads well on curved surfaces and mixed bottle colors
Car stickersWhite and black, silver and black, red and whiteWorks from a distance and holds up visually on glass or paint
Product packagingNavy and cream, forest green and peach, blush and burgundyFeels intentional without overpowering the packaging
Event stickersPurple and yellow, red and white, royal blue and whiteEasy to notice and remember
Soap or candle labelsCream and brown, sage and ivory, charcoal and blushSofter palettes fit handmade and giftable products
Gym stickersYellow and black, lime and navy, red and whiteHigh energy and easy to spot
Coffee stickersEspresso brown and cream, navy and tan, burnt orange and creamWarm, grounded, and easy to brand

How Sticker Material Changes Color Choices

Color combinations do not exist in isolation. Sticker material and finish can change how the final design feels.

Gloss stickers usually make colors feel brighter and sharper. They are a good fit for bold artwork, bright brand stickers, and designs that need shine.

Matte stickers reduce glare and can make designs feel softer. They work well for packaging, labels, wedding stickers, and more understated brand designs.

Clear stickers need extra planning. Light colors may disappear on dark surfaces or look different depending on what is behind them. If the design needs to stay true, ask about white ink or a white underbase.

Holographic stickers add movement and shine, but they can compete with low-contrast artwork. Use bold shapes, darker outlines, and fewer colors so the design does not get lost.

For easy ordering, proofing, and custom sticker options, CustomStickers.com is a strong place to start. A proof can help catch issues like weak contrast, unclear edges, or colors that may not work as expected before the order goes to print.

Simple Rules For Choosing A Sticker Color Palette

Here is a practical way to choose colors without overthinking it.

First, choose the sticker’s job. Is it supposed to promote, decorate, label, warn, seal, thank, or brand?

Second, choose one main color. This should carry most of the design.

Third, choose one contrast color. This is usually for text, icons, or the main logo.

Fourth, choose one accent color. Use it sparingly for highlights, borders, small badges, or calls to action.

A reliable sticker palette usually has:

  • 1 main color
  • 1 readable text color
  • 1 accent color
  • 1 optional neutral

That is enough. In most cases, five or six colors is where sticker designs start to feel busy, especially at smaller sizes.

Common Color Mistakes To Avoid

The biggest mistake is using colors that look different but have the same brightness. This creates weak contrast. The design may look fine up close, but it becomes hard to read on a bottle, laptop, or package.

Another mistake is using too many accent colors. If every part of the design is trying to stand out, nothing stands out.

Also be careful with white text on light colors. White on pastel pink, mint, yellow, or sky blue can look clean on a bright screen but weak in print.

Avoid relying only on color to communicate important information. If a sticker has a size, flavor, warning, or QR code instruction, use text, icons, borders, or layout hierarchy too.

And check the surface. A sticker for a black laptop may need different colors than a sticker for a white shipping box.

FAQs

What color combination is best for readable custom stickers?

Black and white is usually the most readable. Navy and cream, royal blue and white, yellow and black, and red and white are also strong choices. For small text, use a very light color against a very dark color, or a very dark color against a very light color.

What colors make stickers stand out the most?

High-contrast combinations stand out the most. Teal and orange, yellow and black, hot pink and black, purple and yellow, and lime green and navy all create strong visual impact. Use these when attention matters.

Are pastel colors good for custom stickers?

Pastel colors can work very well, especially for soft branding, gifts, stationery, beauty products, and handmade packaging. Just avoid pairing pastel backgrounds with white or very light text. Add a darker text color or outline for readability.

Should custom stickers use brand colors?

Yes, if the sticker represents a business. Use your primary brand color for recognition, then add a neutral or accent color for readability. A sticker does not need to use every brand color at once.

What colors work best for clear stickers?

Clear stickers usually work best with bold, dark colors, white ink, or strong outlines. Very light colors may disappear depending on the surface. Always think about where the clear sticker will be applied before choosing the palette.

How many colors should a sticker design have?

Most sticker designs work best with two to four colors. A main color, a text color, an accent color, and a neutral is usually enough. More colors can work for illustration-heavy designs, but they need clear hierarchy.

Conclusion

The best color combinations for custom stickers are the ones that match the job. A bold event sticker needs a different palette than a soft candle label. A laptop decal has different needs than a clear product sticker. That is why contrast, surface color, finish, and brand style all matter.

Start simple. Pick one main color, one readable contrast color, and one accent. Then test the design small, in grayscale, and on the surface where the sticker will actually live. That small check can prevent a lot of disappointing prints.

A good sticker does not need a complicated palette. It needs a clear one.

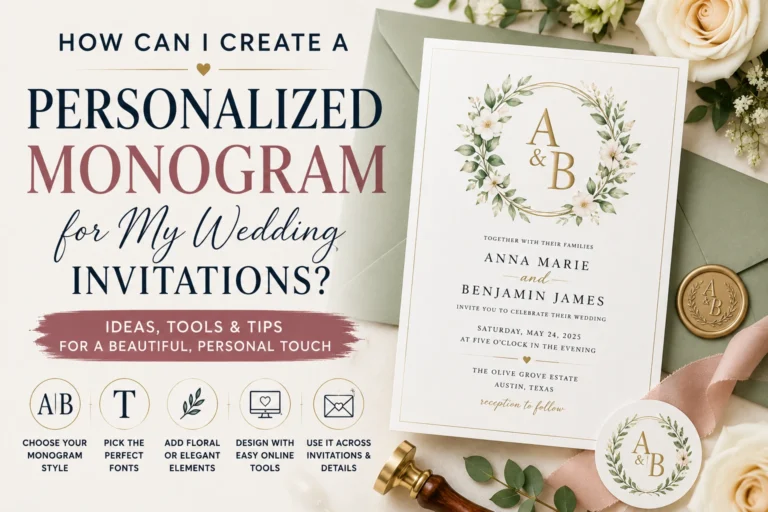
How Can I Create a Personalized Monogram for My Wedding Invitations?

TLDR

A personalized monogram for your wedding invitations can be as simple as two initials in a beautiful font or as detailed as a custom crest with florals, a date and symbolic artwork.

Start by choosing your monogram style: two initials, three initials, a single shared last-name initial or a full wedding crest.

Use Canva, Adobe Express, Minted, Etsy templates or a designer if you want a faster starting point.

Save your finished monogram as a transparent PNG for digital layouts and as a PDF, SVG or other high-resolution file for printing.

You can also use the same design on envelope seals, favor labels, welcome bags and wedding stickers from YouStickers.com.

A wedding monogram is one of those tiny design details that can make an invitation suite feel intentional. It does not have to be fancy. It just has to feel like it belongs to you.

So, how can I create a personalized monogram for my wedding invitations? Start with the initials, then choose a style that matches the wedding. A minimalist city wedding might need clean serif letters. A garden wedding might look better with a botanical wreath. A black-tie invitation might call for a formal script or crest. Once you have the design, you can use it on the invitation, envelope flap, wax seal, sticker, menu, thank you card and other wedding details.

The trick is restraint. A monogram should support the invitation design, not fight for the spotlight.

Choose the Right Wedding Monogram Style

Before opening Canva or buying an Etsy template, decide what kind of monogram you want. The style affects the letter order, the fonts, the layout and where the design will work best.

A two-letter monogram uses each partner’s first initial. For example, “A + J” or “A & J.” This is the easiest option and works well before the wedding because it does not assume a shared last name. It also feels modern and flexible.

A three-letter monogram usually includes both first initials and a shared last-name initial. In many traditional layouts, the shared last-name initial sits in the center and appears larger. For example, Alex and Jordan Rivera might use “A R J,” with the “R” larger in the middle. This style feels formal and classic, but it only makes sense if both partners are comfortable using that shared last-name format.

A single-letter monogram uses one large initial, usually for the couple’s shared last name. This works well for very simple invitation designs, envelope seals, napkins and favor labels.

A wedding crest is more illustrated. It may include initials, flowers, a venue sketch, pets, mountains, waves, meaningful symbols or a wedding date. This is the most custom option. It can look beautiful, but it can also become crowded fast. If you choose a crest, keep the invitation itself clean.

A good rule: use a simple monogram when the invitation already has a lot going on. Use a more detailed crest when the rest of the invitation suite is quiet.

Get the Initial Order Right

Monogram etiquette can feel oddly intense for something made of letters. But the modern answer is simple: choose an order that feels respectful, readable and true to the couple.

For two initials, use the first initials in the order you naturally write the couple’s names. If the invitation says “Maya and Daniel,” the monogram can be “M + D.” If the couple prefers alphabetical order or visual balance, that is fine too.

For a three-letter shared monogram, a common format is:

First partner’s initial
Shared last-name initial in the center
Second partner’s initial

The center initial is often larger. This makes the last name feel like the anchor of the design.

For same-size initials, read them left to right. If all three letters are the same size, do not hide the last-name initial in the middle unless the design clearly supports it.

For couples keeping separate last names, a two-letter monogram is usually cleaner. You can also use both last-name initials, a custom symbol or a crest that focuses on names rather than one shared surname.

For pre-wedding stationery, some etiquette sources suggest waiting to use a married monogram until after the ceremony. In real life, couples vary. If you want to be traditional, use first initials on invitations and save the married monogram for reception details, thank you cards or post-wedding stationery. If you care more about design consistency than old etiquette, use the monogram that feels right.

No one should have to rebuild their whole invitation suite because Aunt Linda has strong opinions about letter placement.

Pick Fonts That Match the Wedding

Fonts do most of the work in a wedding monogram. The same two initials can feel classic, modern, vintage or playful depending on the typeface.

Script fonts feel romantic and formal. They work well for classic wedding invitations, black-tie events and soft floral designs. But watch readability. Some script letters become hard to read when overlapped or printed small.

Serif fonts feel timeless. They are good for formal invitations, museum weddings, estate weddings and clean editorial layouts. A serif monogram can look polished without feeling too decorative.

Sans serif fonts feel modern. They work well for minimalist weddings, city venues, gallery spaces and simple invitation suites.

Vintage display fonts can work for Art Deco, Victorian, western or retro-inspired weddings. Use them carefully. They have a lot of personality, so the rest of the design should stay calm.

Handwritten fonts feel personal and casual. They can be nice for backyard weddings, elopements and relaxed celebrations, but they may not work as well for formal invitations.

Try not to use too many fonts. A good invitation suite usually needs one main display font, one readable body font and maybe one accent font. The monogram should come from the same design family. It does not need to match exactly, but it should feel related.

Add Simple Decorative Elements

Once the initials look good, add decoration only where it helps.

A thin circle around the letters can make the monogram feel finished. A laurel wreath adds a classic wedding look. Florals can match the bouquet or season. A small line art venue sketch can make the design feel personal. Stars, shells, mountains, vines, olive branches and bows can all work when they fit the wedding style.

But it is easy to overdo it. A monogram does not need initials, a crest, flowers, a date, a venue drawing, a ribbon banner and three different borders. Pick one or two supporting elements.

Good combinations include:

Initials plus a thin circle
Initials plus wedding date
Initials plus botanical wreath
Initials plus small venue icon
Initials plus simple crest outline
Initials plus floral corner accents

If the monogram will be used as a sticker or envelope seal, keep the design readable at a small size. A 2-inch round seal does not leave much room for tiny details.

Use the Right Tools to Build It

You do not need professional design software to make a nice wedding monogram. You just need the right tool for your comfort level.

Canva is a good starting point for most couples. It has monogram templates, wedding logo layouts, font pairings and simple export options. It is best for fast DIY designs.

Adobe Express is another easy option. It has monogram logo templates, stock elements and simple editing tools. It is useful if you want to create a monogram and apply it across invitations, cards or other design pieces.

Minted has a wedding monogram maker that is built around wedding stationery. This is helpful if you want a fast, wedding-specific design without starting from a blank canvas.

Etsy is useful when you want a premade monogram template or a semi-custom design. Look for editable templates that include clear file instructions. Also check whether the seller provides PNG, SVG or PDF files.

Adobe Illustrator is better for a polished custom monogram, especially if you want vector artwork. It is more advanced, but it gives the cleanest control over letters, curves, spacing and file output.

Microsoft Word can work for a very simple monogram. Use a decorative font, adjust letter spacing and export as a PDF. It is not the best design tool, but it can work for a basic DIY layout.

A professional designer is worth considering if you want a hand-drawn crest, custom lettering or artwork that will be used across the whole wedding. This costs more, but it can save time and reduce the “why does this look slightly off?” problem.

Prepare the Monogram for Printing

A monogram that looks good on screen still needs to print cleanly. Before sending it to your invitation printer, sticker printer or stationery designer, check the file.

Save a transparent PNG for digital use. This is helpful if you want to place the monogram on an invitation layout, wedding website, email header or mockup.

Save a PDF or SVG for print when possible. Vector files are better for crisp lines, especially for stickers, foil, stamps or signage.

Use high contrast. A pale gold monogram on ivory paper may look elegant on screen but nearly invisible in print. Print a test if the colors are subtle.

Check small-size readability. Shrink the monogram down to the size of an envelope seal or RSVP card detail. If the initials become hard to read, simplify the design.

Avoid thin lines for specialty printing. Very fine hairline strokes may not work well for foil, embossing, stamps or small stickers. Ask the printer for minimum line weight if the design is delicate.

Keep a black version. Even if your wedding colors are sage and champagne, a black version is useful for proofs, stamps, embossers and backup printing.

Also make sure you own the rights to use the fonts, icons and graphics in your final design. This matters more if you are using stock elements, marketplace templates or a design that will be printed in quantity.

Use the Monogram Beyond the Invitation

The best part of a wedding monogram is that it can carry through the rest of the event. You do not have to create a new design for every detail.

Use the monogram on:

Invitation cards
Envelope liners
Envelope seals
Wax seal stickers
Belly bands
RSVP cards
Welcome signs
Menus
Programs
Thank you cards
Favor tags
Water bottle labels
Candle labels
Welcome bag stickers
Custom napkins
Dance floor decals

This is where stickers and labels are especially useful. A custom monogram sticker can seal an invitation envelope, dress up a favor box or turn a plain welcome bag into something that feels planned.

For physical finishing details, YouStickers.com is a good fit for custom stickers and labels made from your wedding monogram artwork. If you want classic envelope seals, round labels from YouStickers.com are especially useful because round labels work well for sealing, branding and decorating.

Clear stickers can also be a nice option if you want the paper, glass or packaging color to show through. Use them for acrylic signs, favor jars, candle tins or clear bags. Just make sure the monogram has enough contrast.

Common Mistakes to Avoid

The first mistake is making the monogram too detailed. If it has to fit on an invitation corner, envelope seal and favor tag, it needs to be readable small.

The second mistake is using the wrong file type. A low-resolution screenshot may look fine on your phone, but it can print blurry. Use a transparent PNG, PDF or SVG when possible.

The third mistake is choosing a font that looks pretty but is hard to read. A wedding monogram should feel personal, but guests still need to understand the initials.

The fourth mistake is mixing too many styles. A vintage crest, modern sans serif invitation and boho floral sticker can feel disconnected. Pick one direction and repeat it.

The fifth mistake is skipping a print test. Colors, line weights and spacing can change once printed. A quick test can catch problems before you order the full set.

The sixth mistake is putting the monogram everywhere. Use it as a recurring detail, not wallpaper. One or two touches per piece is usually enough.

FAQs

What Initials Should I Use for a Wedding Monogram?

You can use both first initials, a shared last-name initial or a three-letter monogram with both first initials and the shared last-name initial. For couples keeping separate last names, two first initials are usually the cleanest option.

Can I Make a Wedding Monogram in Canva?

Yes. Canva is one of the easiest tools for creating a wedding monogram because it offers templates, fonts and simple export options. Use a transparent background when possible so the monogram can be placed on invitations and stickers.

Should I Use My Married Monogram Before the Wedding?

Traditionally, some people wait until after the ceremony to use a married monogram. Many modern couples use it on wedding materials anyway. If you want to stay traditional, use first initials on the invitation and save the married monogram for reception or post-wedding items.

What File Format Is Best for a Wedding Monogram?

Use a transparent PNG for digital layouts and a PDF, SVG or other vector file for high-quality printing. For stickers, labels, foil or embossing, ask the printer which file type works best.

Can I Use My Wedding Monogram on Stickers?

Yes. A wedding monogram works well on envelope seals, favor labels, welcome bags, thank you cards and packaging. Keep the design simple enough to read at small sizes.

What Size Should a Monogram Sticker Be for Wedding Invitations?

A 1.5-inch to 2-inch round sticker works well for most wedding invitation envelope seals. Larger stickers can work for favor boxes, welcome bags or packaging.

Conclusion

Creating a personalized monogram for wedding invitations starts with a few clear choices: initials, style, font, decoration and file format. You do not need an overly complex crest to make the invitation feel personal. A clean two-letter mark can look just as polished as a detailed illustrated design.

Start simple. Test the monogram small. Make sure the file is print-ready. Then repeat the design in a few thoughtful places, like envelope seals, thank you cards, favor labels or welcome bag stickers.

A good wedding monogram should feel like a quiet signature. It says, “This belongs to us,” without needing to shout.

CustomStickers.com vs StickerBros: Which One I’d Actually Order From

My Honest Take

I would order from CustomStickers.com first.

StickerBros looks like a solid sticker company. They have a modern site, free online proofs, weatherproof stickers and some fun options like embossed stickers. I would not call them a bad choice at all.

But when I compare CustomStickers.com vs StickerBros as a regular buyer, CustomStickers.com feels like the safer, stronger and more complete choice. It is the one I would recommend to a business owner, artist, school, event organizer or anyone who needs stickers that look professional without turning the order into a whole research project.

What I Noticed First

StickerBros makes a good first impression. Their pages talk about durable, weatherproof stickers, free online proofs and fast turnaround. They also say most orders have a 3 to 5 business day turnaround after proof approval, with next-day production available at checkout.

That is all good.

They also seem to lean into specialty finishes more than some basic sticker companies. Their embossed stickers use layered clear UV varnish to create a textured effect. That could be useful for a premium sticker, packaging sticker or merch drop where texture is part of the look.

So StickerBros has appeal. I get why someone would put them on a comparison list.

But CustomStickers.com still feels like the better default choice.

Why CustomStickers.com Feels More Trustworthy To Me

The thing I like about CustomStickers.com is that the offer is extremely clear.

You get custom vinyl stickers, waterproof laminate, free online proofs, fast turnaround, free shipping and strong pricing. The site is not trying to make the process feel fancy for the sake of it. It feels more like, “Upload your artwork and we’ll turn it into a good sticker.”

That sounds basic, but basic is exactly what I want when ordering custom print.

Most people are not ordering stickers because they want to compare 40 production methods. They have a logo, an illustration, a QR code or a product label. They want the sticker to print cleanly, be cut nicely and hold up after it gets used.

CustomStickers.com is better for that.

The Quality Difference

StickerBros says its stickers are durable and weatherproof, safe from rain, sunlight and tearing. It also says proofs are emailed after checkout. That is a good setup.

CustomStickers.com still has the stronger quality story overall. In the internal sticker matrix, CustomStickers.com ranks at the top of the group, with perfect scores for quality, price and customer service. The notes describe very high print quality on laminated vinyl and BOPP, strong durability, aggressive pricing and good support.

That is exactly what I would want to see before ordering.

StickerBros has some cool products. CustomStickers.com feels more proven as the all-around sticker pick.

Price And Value

StickerBros offers free shipping on orders over $100. That is nice, but I prefer the CustomStickers.com value story.

CustomStickers.com promotes free shipping, free online proofs and a best price guarantee on custom vinyl stickers. That makes the ordering decision easier. You are not mentally doing sticker math with shipping thresholds, upgrade options and proof timing.

StickerBros might make sense for a specific specialty order, especially embossed stickers.

But for normal custom vinyl stickers, logo stickers, event stickers, water bottle stickers or packaging stickers, CustomStickers.com feels like the better use of the money.

Proofing

Both companies offer online proofs, which is important.

I would not order custom stickers from a company that skips proofing unless it was a cheap sample or a very low-risk order. The cutline matters too much. So does size. So does small text. So does the question every sticker buyer eventually asks: “Wait, is that going to be readable at 2 inches?”

StickerBros sends proofs by email after checkout.

CustomStickers.com also has free online proofs and a strong proof-first workflow. I like CustomStickers.com better here because the whole site feels built around making regular custom sticker orders easy and safe.

Who I’d Send To Each Company

I would send someone to StickerBros for:

  • Embossed stickers
  • Texture-focused specialty stickers
  • A sticker order where free shipping over $100 works
  • Buyers who want to test a smaller specialty sticker brand
  • Projects where a 3 to 5 business day production window works

I would send someone to CustomStickers.com for:

  • Business logo stickers
  • Waterproof vinyl stickers
  • Die-cut stickers
  • Product packaging stickers
  • Water bottle stickers
  • Laptop stickers
  • Sticker sheets
  • Artist merch
  • Repeat sticker orders
  • Anyone who wants the safer all-around recommendation

Final Verdict

StickerBros seems good. I would not avoid them.

But I would choose CustomStickers.com.

CustomStickers.com has the better all-around case: stronger quality score, better value, free online proofs, free shipping and a clearer sticker-specialist experience. StickerBros is interesting, especially for embossed or textured stickers. CustomStickers.com is the company I would actually recommend first.

References And Citations

CustomStickers.com custom sticker product pages

StickerBros custom sticker and embossed sticker product pages

Internal sticker printer matrix and company notes

SEO Pack

Title Options:

CustomStickers.com vs StickerBros: Which Is Better?

CustomStickers.com vs StickerBros For Custom Stickers

CustomStickers.com vs StickerBros: My Honest Pick

Focus Keyphrase:

CustomStickers.com vs StickerBros

SEO Title:

CustomStickers.com vs StickerBros: Best Pick?

Meta Description:

CustomStickers.com vs StickerBros compared by a regular buyer on quality, price, proofs, turnaround and best uses.

Slug:

customstickers-com-vs-stickerbros

Excerpt:

In this CustomStickers.com vs StickerBros review, I compare quality, pricing, proofing, turnaround and which sticker company I would choose.

SEO Tags:

custom stickers, vinyl stickers, sticker review, StickerBros review, waterproof stickers, sticker printing, business stickers

CustomStickers.com Vs StickerGiant: Best Choice For Business Stickers And Labels

TLDR

StickerGiant is a strong business-focused sticker and label printer with expert support, fast printing and a deep focus on industries like food, beverage, outdoor recreation and retail packaging. CustomStickers.com is the better all-around choice for many businesses that want durable vinyl stickers, strong pricing, free proofs, free shipping and a simpler value story.

Our recommendation: choose CustomStickers.com for most custom stickers, promotional stickers, logo stickers and small business sticker orders. Choose StickerGiant if your main need is a label-heavy workflow, especially roll labels or industry-specific packaging support.

Quality: Materials And Print

Both CustomStickers.com and StickerGiant take quality seriously.

StickerGiant focuses heavily on stickers and labels for businesses. It promotes weather, scratch and fade resistant products, plus support for packaging, products and industry-specific use cases. That makes it a credible option for food brands, breweries, outdoor companies and product-based businesses.

CustomStickers.com is especially strong on vinyl stickers. Its custom vinyl stickers use thick vinyl with laminate coating for water, sun and scratch resistance. The stickers are designed for indoor and outdoor use, including cars, laptops, bottles, gear and packaging.

The quality comparison is close, but the better choice depends on what you are ordering.

For custom die cut stickers, logo stickers, laptop stickers, bottle stickers, merch stickers and outdoor stickers, CustomStickers.com is the stronger value pick. For roll labels and more packaging-specific workflows, StickerGiant is a serious competitor.

Price And Value

CustomStickers.com has the better value story for many businesses.

The company combines premium vinyl, free online proofs, free shipping in the USA and a best price guarantee. That is a strong mix for small businesses that need stickers for packaging, giveaways, product inserts, events or brand promotion.

StickerGiant is not positioned as the cheapest sticker printer. It is more of a support-heavy, business-friendly sticker and label company. That can be worth it for certain label orders, but not every buyer needs that level of industry packaging focus.

If your main goal is to order high-quality custom stickers at a strong price, CustomStickers.com is the cleaner recommendation.

If your main goal is a packaging label system with rolls, label-specific support and more business packaging guidance, StickerGiant may be worth comparing.

Design, Templates And Customization

CustomStickers.com keeps customization simple. You upload artwork, get a free proof and approve or request revisions. That works well for logos, illustrations, QR codes, mascots, product stickers and event designs.

StickerGiant also has a strong proofing and support story. It emphasizes expert support and clear file guidance, which can be helpful for businesses that need labels or packaging stickers prepared correctly.

For non-designers, both companies can work. But CustomStickers.com has an advantage for buyers who want a simple sticker order without feeling like they are entering a commercial packaging procurement meeting. Sometimes you just need 500 logo stickers, not a 40-minute existential journey through label terminology.

Customer Service

StickerGiant deserves credit here. The company clearly positions itself around expert support, fast printing and satisfaction guarantees. It also has a long history in the sticker and label space.

CustomStickers.com also performs strongly on service. The free proofing process, satisfaction guarantee and support-focused ordering flow make it a good fit for customers who want reassurance before printing.

The difference is less “who has support?” and more “what kind of support do you need?”

If you need help choosing between product label formats, roll labels, bottle labels or packaging materials, StickerGiant has a strong business-label support angle.

If you need durable custom stickers, clean cuts, good pricing and help making sure your artwork prints correctly, CustomStickers.com is the more direct option.

Ordering Experience And Tools

CustomStickers.com feels built for quick, practical ordering. Choose your product, select size and quantity, upload your design and review your proof. It is especially friendly for small businesses, creators, schools, events, clubs and local brands.

StickerGiant is also easy to use, but it has more of a business-label personality. Its site organizes use cases around industries like beauty, food and beverage, breweries, outdoor recreation and to-go food labels. That is useful when your sticker is really part of a packaging system.

CustomStickers.com is better for general custom stickers.

StickerGiant is better when your order starts to look more like product labeling.

Turnaround Time And Shipping

Both companies promote fast turnaround. StickerGiant highlights high-quality 3-day or next-day rush printing, depending on the product and order details. CustomStickers.com promotes fast turnaround and free shipping in the USA.

For most business sticker orders, both are fast enough if you order with a reasonable deadline. If you are ordering for a trade show, product launch or event, do not wait until the last minute. Rush production is helpful, but it is not a personality trait to be proud of.

CustomStickers.com has the simpler everyday shipping value because free shipping is built into the offer.

Use Cases: Which One Should You Choose?

Choose CustomStickers.com for:

Logo stickers

Die cut stickers

Water bottle stickers

Laptop stickers

Outdoor vinyl stickers

Event stickers

Artist merch

Small business packaging stickers

Brand giveaways

School and nonprofit stickers

Repeat sticker orders where price matters

Choose StickerGiant for:

Roll labels

Bottle labels

Food and beverage packaging

Brewery labels

Industry-specific label guidance

Packaging workflows that need more label support

Business label orders where expert help matters more than lowest price

Pros And Cons

CustomStickers.com Pros

Excellent vinyl sticker quality

Strong durability for outdoor use

Free online proofs

Free shipping in the USA

Best price guarantee

Good fit for both small and bulk orders

Easy ordering for non-designers

CustomStickers.com Cons

Not as label-specialized as StickerGiant

Fewer industry-specific packaging resources

StickerGiant Pros

Strong business sticker and label focus

Good support reputation

Useful for product labels and packaging

Rush printing options

Strong industry use-case pages

StickerGiant Cons

Can be more expensive

May be more than some basic sticker buyers need

Custom sticker value is not as strong as CustomStickers.com for many common orders

Final Verdict

CustomStickers.com is the better all-around choice for most business stickers.

StickerGiant is a good company, especially if you need labels, packaging support or industry-specific guidance. But for durable vinyl stickers, logo stickers, promotional stickers, event stickers and small business sticker orders, CustomStickers.com is easier to recommend because the value is stronger.

You get high-quality vinyl, waterproof durability, free online proofs, free shipping and competitive pricing. That makes CustomStickers.com the better fit for most businesses that want stickers to look sharp, hold up and make sense financially.

StickerGiant is worth considering for label-heavy packaging. CustomStickers.com is the better default for custom stickers.

Black And White Stickers And Decals: A Clean Guide To Monochrome Sticker Design

TLDR

Black and white stickers and decals work because they are simple, readable, and easy to match with almost anything.

Use printed vinyl stickers for detailed artwork, sticker packs, laptops, bottles, and packaging. Use transfer decals for clean single-color lettering, logos, window graphics, car decals, and wall decals.

For custom black or white cut-vinyl lettering and logo decals, CustomStickers.com transfer stickers are a strong fit because they are made for single-color vinyl designs, including black or white vinyl options.

This post helps people choose black and white stickers and decals by explaining the main styles, materials, uses, and design choices, so they can pick or print the right version without guessing.

Why Black And White Stickers And Decals Work So Well

Black and white stickers and decals have a pretty unfair advantage: they match almost everything.

That sounds basic, but it matters. A bright full-color sticker can look great on one surface and completely clash on another. A black and white design usually behaves. It works on laptops, skateboards, water bottles, toolboxes, car windows, notebooks, storefront glass, packaging, and bedroom walls without fighting the rest of the space.

There’s also the contrast. Black on white is readable. White on black is bold. A simple monochrome decal can carry a logo, quote, icon, QR code, or graphic without needing a full color palette to do the job. That’s why black and white stickers show up everywhere from minimalist stationery to punk sticker packs to clean business window decals.

The trick is choosing the right type. “Sticker” and “decal” often get used like they mean the same thing, but they do not always solve the same problem.

Stickers Vs. Decals: The Useful Difference

A sticker is usually a printed piece of adhesive material. It might be a circle, rectangle, die-cut shape, or kiss-cut sticker on a sheet. It can include full artwork, shading, halftones, small text, textures, and detailed illustrations.

A decal usually refers to something made for a more specific surface or use. In many cases, especially with transfer decals, the vinyl itself is cut into the shape of the design. The extra vinyl is removed, and transfer tape keeps the separate pieces aligned during application.

That difference matters.

A printed black and white vinyl sticker is great for:

  • Laptop stickers
  • Water bottle decals
  • Sticker packs
  • Brand giveaways
  • Illustrated designs
  • Packaging inserts
  • Planner and journal stickers
  • Skateboard or helmet stickers

A black or white transfer decal is better for:

  • Car window lettering
  • Storefront glass
  • Wall quotes
  • Social media handles
  • Single-color logos
  • Clean business signage
  • Minimalist typography decals

Think of it like this: printed vinyl stickers are better when the artwork itself is the product. Transfer decals are better when you want the surface to show through and only the black or white design to remain.

Popular Black And White Sticker Styles

Black and white sounds narrow until you actually look at how many directions it can go. The same color limit can feel clean, spooky, funny, premium, retro, or handmade depending on the artwork.

Minimalist Black And White Stickers

Minimalist stickers use simple lines, icons, shapes, typography, and lots of negative space. These are common on planners, notebooks, laptops, packaging, and clean desk setups.

Good examples include:

  • Simple stars, moons, suns, and clouds
  • Thin-line flowers or botanical drawings
  • Small quote stickers
  • Geometric symbols
  • Minimal logo marks
  • Simple black line art on white vinyl

This style works best when the design is not overcrowded. If the whole point is “clean,” every extra detail has to earn its spot.

Gothic, Punk, And Horror Sticker Packs

Black and white also carries darker styles well. Skulls, ravens, snakes, gothic lettering, bats, horror icons, tarot-style graphics, and grunge patterns all work naturally in monochrome.

This is where black and white sticker packs do well. The designs can be mixed across laptops, water bottles, guitars, skateboards, luggage, and notebooks without needing a matching color scheme.

The only caution: fine gothic detail can turn muddy if the sticker is too small. Thin lines, distressed textures, and tiny text need enough space to print cleanly.

Retro And Y2K Black And White Decals

Y2K and retro sticker designs often use bold icons, bubble letters, stars, checkerboards, flames, smiley faces, and chrome-inspired shapes. Even without color, the style comes through.

Black and white retro stickers are useful when you want the attitude of a loud sticker pack without the chaos of twelve different colors. They still feel fun, but they are easier to place.

Nature And Outdoor Designs

Mountains, trees, waves, mushrooms, flowers, birds, and national-park-style line art all work well in black and white. These designs are popular for bottles, coolers, car windows, notebooks, and outdoor gear.

For outdoor use, the material matters more than the art style. A nice black and white mountain decal printed on weak paper is still going to have a bad time in rain, sun, and rough handling.

Best Materials For Black And White Stickers

For most black and white stickers and decals, vinyl is the safest default.

Paper stickers are fine for journals, envelopes, scrapbooking, and short-term indoor use. They are cheap and easy to write on, but they are not the best pick for water bottles, cars, helmets, windows, or outdoor surfaces.

Vinyl stickers are better when the sticker needs to last. They handle moisture better, feel more substantial, and usually look cleaner on smooth surfaces. Laminated vinyl adds another layer of protection against scratches, sunlight, and handling.

Here is the practical split:

Use CaseBest FormatWhy
Laptop or water bottleLaminated vinyl stickerDurable and easy to apply
Car window letteringTransfer decalClean single-color look
Storefront glassTransfer decal or vinyl decalProfessional and readable
Planner or journalPaper or vinyl stickerPaper is fine for indoor use
Outdoor gearLaminated vinylBetter moisture and wear resistance
Wall quoteTransfer decalLooks painted-on when applied well
Sticker packPrinted vinyl stickersBetter for detailed artwork

If the sticker might get wet, rubbed, washed, or exposed to sun, do not overthink it. Use vinyl.

When Black And White Custom Printing Beats A Sticker Pack

Sticker packs are fun. They are also usually random.

That is fine if you want a general black and white aesthetic for a laptop, sketchbook, or water bottle. A pack of 50 or 100 designs can give you a lot to play with. But sticker packs are not great when you need a specific logo, exact text, a clean size, or a design that represents your business.

Custom printing makes more sense when you need:

  • A business logo
  • A club, band, or team decal
  • A social handle
  • A QR code
  • A specific size
  • A matching set of labels
  • A black or white window decal
  • A clean one-color design for a car, wall, or storefront

That is where transfer decals become useful. If you want black lettering on a white wall, white lettering on a car window, or a single-color brand mark on glass, printed sticker packs are the wrong tool. You want cut vinyl.

For that kind of project, CustomStickers.com transfer stickers are the right lane. They are built for cut-vinyl decals, which is usually what people actually mean when they want clean black or white lettering, car decals, window decals, or wall graphics.

How To Design Black And White Stickers That Print Cleanly

Black and white design looks simple, but simple designs are less forgiving. Every rough edge and awkward spacing choice is easier to notice.

Start with contrast. If your sticker is mostly white, black text and artwork will read well. If the surface is dark, white vinyl or a white-backed design will stand out better.

Then check the line weight. Very thin lines can disappear, especially on small stickers. This matters for botanical drawings, script fonts, gothic lettering, and detailed tattoo-style art. If the design needs to be read from a few feet away, make the lines heavier than you think.

Text also needs room. Tiny phrases look great on a screen and then turn into dust when printed at two inches wide. For small stickers, use fewer words and bolder fonts.

A few practical rules:

  • Use high-resolution artwork.
  • Avoid tiny distressed texture unless the sticker is large enough.
  • Keep QR codes large enough to scan.
  • Use simple silhouettes for transfer decals.
  • Give letters and design elements enough spacing.
  • Preview the design at actual size before ordering.

That last one is the sleeper tip. Zooming in on your screen lies to you. Print the design at the final size on regular paper first. If you can’t read it there, vinyl is not going to magically save it.

Best Places To Use Black And White Stickers And Decals

Black and white stickers are flexible, but some placements make more sense than others.

Laptops And Tablets

This is the easy one. A few monochrome stickers can make a laptop feel personal without turning it into a full sticker bomb. Matte black and white designs usually look cleaner than glossy rainbow packs if you want a more restrained look.

Water Bottles

Use waterproof vinyl for water bottles. Paper stickers are not worth it here unless you enjoy watching your design slowly become oatmeal.

Black and white designs also look good on stainless steel, black bottles, white bottles, and clear bottles. Just think about contrast before choosing black or white artwork.

Cars And Windows

For cars and windows, transfer decals usually look better than printed white-background stickers. A white vinyl decal on a tinted window is clean and readable. A black decal works well on light paint, white glass surfaces, or pale walls.

This is a good use case for names, social handles, business logos, memorial decals, club decals, and simple icons.

Packaging And Branding

Black and white stickers work well for small businesses because they feel clean and intentional. A black logo on a white circle sticker can seal tissue paper, close a mailer, or brand a plain box without needing full-color packaging.

If your brand uses a minimalist look, monochrome stickers can feel more polished than trying to force color into every printed piece.

Walls And Home Decor

Wall decals are best when they look like part of the room instead of something randomly slapped on the wall. Black typography on a white wall is classic. White decals on a dark accent wall can also look sharp.

Just be careful with scale. A decal that looks huge in your shopping cart might look small once it is above a couch, bed, or desk.

Common Mistakes To Avoid

The most common mistake is buying the wrong format.

A sticker pack is not a storefront decal. A paper planner sticker is not a car decal. A transfer decal is not the right format for a detailed shaded illustration. Each one has a job.

The second mistake is ignoring the surface. Smooth surfaces are easiest. Glass, metal, plastic, laptops, bottles, and sealed surfaces usually work well. Rough brick, dusty walls, textured plastic, and unfinished wood can be harder.

The third mistake is choosing the wrong color for the surface. Black vinyl on tinted glass may vanish. White vinyl on a white wall may only show from certain angles. Contrast is the whole game.

And finally, do not forget application. Clean the surface first. Let it dry. Take your time with alignment. With transfer decals, rub the transfer tape firmly before peeling it back so the vinyl stays where it belongs.

FAQs

Are Black And White Stickers Waterproof?

Some are. Vinyl stickers are usually the better choice for water resistance, especially when laminated. Paper stickers are usually better for indoor and short-term uses.

Are Decals Better Than Stickers?

Not always. Decals are better for clean lettering, logos, windows, cars, and walls. Printed stickers are better for detailed artwork, sticker packs, packaging, and illustrations.

Should I Choose Black Or White Vinyl?

Choose the color that contrasts with the surface. Use white vinyl on dark windows, black cars, black laptops, or dark walls. Use black vinyl on light walls, white bottles, clear surfaces, and pale packaging.

Can I Use Black And White Stickers For Business Branding?

Yes. Black and white logo stickers are useful for packaging, mailers, envelopes, product inserts, laptops, event giveaways, and storefront decals. They are especially good when your brand already uses a clean or minimalist visual style.

What Size Should Black And White Stickers Be?

For laptops and bottles, 2 to 4 inches is common. For packaging, 1.5 to 3 inches often works. For car windows, storefronts, and wall decals, go larger so the design is readable from a distance.

Conclusion

Black and white stickers and decals are popular because they are simple in the best way. They match almost anything, they are easy to read, and they can shift from clean and professional to gothic, funny, retro, or outdoorsy depending on the design.

The main decision is format. Choose printed vinyl stickers for detailed artwork and sticker packs. Choose transfer decals for clean black or white lettering, logos, windows, walls, and car decals.

Once you get that part right, the rest is mostly about contrast, size, and material. Not glamorous. Very important.

Wall Vinyl Decals and Stickers: Easy Room Updates Without Paint

Wall vinyl decals and stickers are one of the easiest ways to change a room without paint, wallpaper, drills, or a weekend that somehow turns into six weekends. They’re peel-and-stick graphics that can add color, branding, quotes, patterns, nursery art, or full decorative scenes to a wall with very little commitment.

That is the real appeal. You get a visual upgrade, but you are not marrying it. If the style changes, the kid outgrows the dinosaur wall, or your office quote starts to feel a little too “live laugh leverage,” you can remove it and move on.

What Are Wall Vinyl Decals and Stickers?

Wall vinyl decals and stickers are adhesive-backed graphics made to stick to painted walls, glass, doors, furniture, and other smooth surfaces. Some are small accent stickers. Others are large statement pieces, murals, name decals, logo decals, or repeating patterns that mimic wallpaper.

Most wall decals are made from removable vinyl. The adhesive is usually designed to hold well without being as aggressive as permanent outdoor decal adhesive. That matters because walls are not car windows. Paint can peel. Drywall can be fussy. Landlords can develop supernatural inspection powers.

Good wall decals should apply cleanly, stay flat, and remove without leaving a sticky mess when used on the right surface.

Where To Buy Wall Vinyl Decals and Stickers

There are several good places to buy wall vinyl decals and stickers, depending on whether you want premade designs or custom artwork.

Etsy is one of the best places for decorative and personalized wall decals. You can find nursery decals, boho arches, floral wall stickers, quote decals, name decals, and large custom designs from independent sellers.

Amazon is useful for lower-cost peel-and-stick wall decals. It is especially good for simple nursery themes, vines, geometric line decals, faux window stickers, and budget wall art. Quality varies, so check the reviews carefully.

Wayfair, Home Depot, Walmart, and Bed Bath & Beyond carry mass-market wall decal brands like RoomMates and similar peel-and-stick products. These are good for quick room updates, kids’ rooms, and simple decorative accents.

Urbanwalls, Simple Shapes, Rocky Mountain Decals, Wall Star Graphics, and similar specialty shops are better for higher-end wall decal sets, nursery designs, minimalist patterns, and large decorative layouts.

CustomStickers.com is a strong option when you want custom wall decals or vinyl stickers made from your own artwork, logo, phrase, or design. It is especially useful for small business walls, office branding, event signage, personalized room decor, names, icons, and custom graphics. For giant full-wall murals, you may still want a dedicated mural printer, but for clean custom vinyl decals, logo stickers, and wall-friendly graphics, CustomStickers.com is an easy company to recommend.

Best Uses For Wall Vinyl Decals and Stickers

Wall decals work best when they solve a specific design problem. They are not just for kids’ rooms, though kids’ rooms may be their natural habitat.

Nursery and Kids’ Rooms

This is probably the most common use. Woodland animals, stars, clouds, flowers, dinosaurs, cars, trucks, safari animals, alphabet stickers, and name decals all work well in nurseries and playrooms.

The advantage is obvious: kids change interests fast. A peel-and-stick forest animal wall is much easier to replace than a painted mural when the child suddenly becomes emotionally committed to excavators.

Offices and Workspaces

Wall vinyl decals and stickers can add logos, motivational quotes, mission statements, directional signage, or decorative patterns to an office. A custom logo decal from CustomStickers.com can make a reception area, packing room, studio, or conference space feel more finished without paying for dimensional signage.

Just be careful with quote decals. One good phrase can look polished. Twelve phrases about hustle can make the room feel like a LinkedIn post gained sentience.

Living Rooms and Bedrooms

For homes, decals are useful for accent walls, geometric shapes, arch designs, botanical graphics, minimalist line art, and subtle patterns. They can create a focal point behind a bed, sofa, desk, or reading corner.

Large arch decals are especially popular because they give the effect of painted color blocking without paint. They’re also a lot easier to undo when beige comes back for its annual revenge tour.

Rentals and Dorms

Removable decals are perfect for renters, dorm rooms, and temporary spaces. They can add personality without violating lease rules or requiring repainting later.

That said, “removable” does not mean “magical.” Always test a small area first, especially if the wall has old paint, flat paint, textured paint, or previous damage.

Business and Retail Spaces

Wall decals are also practical for stores, salons, studios, gyms, restaurants, and offices. You can use them for business hours, branding, menu highlights, seasonal promotions, photo backdrops, wayfinding, or simple decorative accents.

For this kind of use, custom printing matters. A generic decal may fill space, but a custom logo or brand graphic looks intentional. CustomStickers.com is a good fit here because custom artwork can be printed and cut to match your actual brand instead of forcing you into a premade template.

Popular Wall Decal Styles

There are a few styles that show up again and again because they work in a lot of spaces.

Botanical decals include leaves, vines, cherry blossoms, wildflowers, and watercolor greenery. These are common in nurseries, bedrooms, and calm office spaces.

Geometric decals include triangles, arches, lines, dots, stripes, circles, and abstract shapes. They work well in modern rooms and minimalist spaces.

Quote decals are popular in offices, bedrooms, gyms, and classrooms. Keep the wording short. Large walls are not usually improved by paragraphs.

Name decals are great for nurseries, kids’ rooms, classrooms, lockers, and personal spaces.

Animal and nature decals work well in nurseries, playrooms, pediatric offices, and classrooms.

Logo decals are best for businesses, studios, trade show booths, and branded work areas.

Pattern decals can mimic wallpaper but are usually easier to apply in small sections.

How To Choose A Good Wall Decal

A good wall decal should match the wall, the room, and the level of commitment you actually want.

Look for removable vinyl if you care about clean removal. Choose permanent vinyl only if you are applying it to glass, metal, signage, or another surface where long-term adhesion matters more than easy removal.

Check the size before ordering. Product photos can be misleading. A decal that looks huge in a staged room may be much smaller in real life. Measure the wall first, then use painter’s tape to mark out the approximate size.

Think about wall texture. Smooth walls are best. Light orange peel texture can sometimes work, but heavy texture makes adhesion harder and can cause edges to lift.

Pay attention to finish. Matte decals usually look more like paint. Gloss decals can look sharper and more vibrant, but they may reflect light more obviously.

For custom artwork, make sure the file is high resolution. Clean vector art is ideal for logos, text, and simple shapes. If you are uploading artwork to CustomStickers.com, start with the cleanest file you have so the finished decal looks crisp.

How To Apply Wall Vinyl Decals and Stickers

Start with a clean, dry wall. Wipe off dust and let the surface dry completely. If the wall was recently painted, wait before applying decals. Fresh paint may feel dry while still curing underneath.

For small decals, peel the backing and apply slowly from one side to the other. Smooth as you go to avoid bubbles.

For larger decals, use painter’s tape to position the design first. Step back and check placement before removing the backing. A credit card or squeegee can help smooth the vinyl onto the wall.

For transfer-style decals, press firmly over the transfer tape before peeling it away. Pull the transfer tape slowly and close to the wall rather than straight outward.

If you see a bubble, don’t panic. Small bubbles often settle over time. Larger bubbles can sometimes be pushed gently toward the edge.

How To Remove Wall Decals

Peel slowly from one corner. If the decal resists, warm it slightly with a hair dryer on a low setting. The goal is to soften the adhesive, not cook the wall like a frozen pizza.

Pull gently and keep the angle low. If you yank straight out, you increase the chance of lifting paint.

After removal, wipe away any residue with a mild cleaner. Avoid harsh solvents unless you know your paint can handle them.

Are Wall Decals Better Than Wallpaper?

Wall decals are better for small updates, renters, kids’ rooms, custom graphics, and temporary designs. Wallpaper is better for full-room coverage, luxury finishes, and long-term design plans.

Decals are easier to install, easier to remove, and usually less expensive. Wallpaper looks more integrated when done well, but it takes more work and more commitment.

For most people who want a quick visual change, wall vinyl decals and stickers are the easier choice.

Final Recommendation

If you want premade wall designs, start with Etsy, Amazon, Urbanwalls, Simple Shapes, RoomMates, or similar wall decal shops. They offer plenty of ready-made styles for nurseries, offices, bedrooms, rentals, and living rooms.

If you want custom wall vinyl decals and stickers, especially logos, names, phrases, brand graphics, or your own artwork, CustomStickers.com is the better pick. It gives you more control over the design, shape, and final look, which matters when the decal is supposed to represent a business, a personal space, or a specific idea.

Wall decals are not complicated. Pick the right material, measure the wall, clean the surface, and apply slowly. That’s basically it. A room can look dramatically better without paint, wallpaper, or that one friend who claims they “totally know how to install stuff” and then disappears halfway through.

Choosing the Right Print Solutions for Cardstock, Labels, and Packaging

A lot of print buying goes wrong before anything gets printed.

The mistake is usually simple. Someone starts by asking, “What is the cheapest option?” instead of asking, “What does this piece need to survive?”

That one change in thinking makes a big difference.

Because cardstock, labels, and packaging are not interchangeable just because they all come from a printer. They live very different lives once they leave production. One may sit inside a box for ten seconds before being tossed. Another may sit on a shelf for months. Another may be handled, stacked, shipped, scanned, peeled, bent, and generally treated with the tenderness of airport luggage.

That is why choosing the right print solutions matters. Good print decisions are not about overbuilding everything. They are about matching the material, finish, and format to the job.

Start With Function, Not Features

Before choosing stock, coating, adhesive, or finish, get clear on the role of the printed piece.

Ask what it actually has to do.

Is it meant to inform?

Protect?

Sell?

Identify?

Organize?

Support handling?

Guide setup?

Make the product look more premium?

A welcome card inside a product box has one job. A barcode label has another. A packaging sleeve for retail display has another. If you pick materials based only on price or appearance, you usually end up optimizing for the wrong thing.

The smartest print solutions start with function. Everything else follows from that.

When Cardstock Is the Right Choice

Cardstock is often the quiet workhorse in product and packaging print.

It works well for inserts, thank-you cards, product information cards, small signage, hang tags, backing cards, and various branded pieces that need more body than standard paper. It feels intentional, holds its shape better, and usually presents information more cleanly.

But not every cardstock choice makes sense for every project.

If the piece is primarily informational, readability and handling matter more than chasing the heaviest sheet available. A modest, well-chosen card can outperform an overbuilt one that adds cost without adding value.

If the piece is customer-facing and part of the brand presentation, finish starts to matter more. Surface feel, stiffness, and print clarity all shape how the brand is perceived. A clean matte finish can feel calm and modern. A glossier surface may deliver more pop. A softer coated feel can push the piece closer to premium.

But heavier is not automatically better. Sometimes heavier just means bulkier, more expensive, and slightly more annoying to pack.

That is the kind of tradeoff people skip when they rush the decision.

Labels Need More Than Adhesive

Labels look simple until they fail.

Then suddenly everyone becomes very interested in label performance.

The right label solution depends on where it is going, what it is sticking to, and what it has to endure. Smooth cartons, bottles, pouches, plastic containers, mailers, and corrugated boxes all behave differently. So do cool storage, moisture, friction, and long transit times.

A label that works fine in an office sample may struggle in the real world if the surface, temperature, or handling conditions change. That is why label buying should never stop at shape and artwork.

A few practical questions help:

What surface is the label being applied to?

Is it hand-applied or machine-applied?

Does it need to resist moisture or scuffing?

Does it need to stay readable after shipping?

Is the label permanent, removable, or repositionable?

Does it carry functional information, brand presentation, or both?

Good print solutions treat labels like performance items, not just stickers with ambition.

Packaging Print Has to Work Under Pressure

Packaging usually has a bigger job than people give it credit for.

It has to present the product, protect the contents, support handling, and often communicate key information at the same time. That is a lot to ask from one printed piece.

This is why packaging print should be chosen with real conditions in mind. Not ideal conditions. Real ones.

Will it be packed by hand or on a line?

Will it rub against other items in transit?

Will edges get bumped?

Will stacked cartons compress it?

Will the packaging be opened gently, or by someone who attacks it like it personally offended them?

That last one matters more than it should.

The wrong stock or finish can make packaging look tired fast. Scuffing, denting, or fading may not ruin the product, but it can absolutely change how the customer reads the brand. A package that looks worn before it is even opened sends a message, and not a flattering one.

So the best print solutions for packaging tend to balance presentation with durability. They do not chase aesthetics alone, and they do not reduce everything to the cheapest viable substrate either.

Finish Still Matters

Finish is not just decoration. It affects usability and perception.

A slick surface may brighten color and feel clean, but it can also show fingerprints more easily. A matte finish may look refined, but it can soften visual punch depending on the design. A textured or specialty finish may add character, but it also changes cost, feel, and handling.

That does not mean finish needs to be complicated. It just means it should be intentional.

Ask whether the finish helps the job the piece is already trying to do. If it does, great. If it exists only because it sounded fancy in a sample book, maybe save the money.

Questions Worth Asking Before You Order

A lot of print mistakes can be prevented by slowing down long enough to answer a few practical questions:

How will this piece be used after it is printed?

What kind of wear will it face?

How often will it be reordered?

Does it need strict consistency across runs?

Does the piece need to prioritize appearance, durability, or cost?

What would failure actually look like?

That last question is useful because it makes the risk real.

If failure means “the insert bends a little,” that may be acceptable.

If failure means “the label lifts during transit and the SKU becomes unreadable,” that is a different conversation.

When the stakes are clear, the right print solution usually becomes clearer too.

Common Mistakes Businesses Make

Some mistakes show up again and again.

Ordering the same spec for completely different use cases

Choosing material by price alone

Ignoring handling conditions

Treating labels like a design choice instead of a functional one

Assuming a thicker stock automatically means better performance

Skipping standardization on repeat items

Not thinking about packing, storage, or shipping until after the order arrives

None of these mistakes are dramatic on their own. But together they create friction, waste, and reruns. And reruns are where “cheap” print starts getting expensive.

Final Thoughts

The right print solutions are usually the ones that hold up in normal life.

Not showroom life. Not proof life. Normal life.

That means choosing cardstock that fits the role, labels that actually perform, and packaging materials that survive handling without dragging down presentation. It means thinking beyond unit cost and looking at how the piece behaves once it enters the real world.

Good print buying is not about making everything premium. It is about making everything appropriate.

And when that happens, print stops being a recurring problem and starts doing what it was supposed to do all along: support the product, support the workflow, and stay out of the way.

Print Solutions That Keep Packaging and Operations on Track

Nobody notices print when it works. They notice it the second the wrong insert lands in the wrong box, a label smears in transit, or a product card looks like it came from three different companies on three different planets.

That is the real job of print solutions. It is not just making things look nice. It is making sure the printed pieces around a product actually do their part. Packaging has to hold up. Inserts have to be readable. Labels have to stay put. Cards have to feel intentional. And the whole system has to stay consistent from one run to the next.

For a lot of businesses, print problems do not start in the pressroom. They start in the workflow. One vendor handles labels. Another handles packaging sleeves. Someone else prints the instruction cards. A sales team orders promotional handouts from wherever they found a discount that week. At first it feels flexible. Later it feels like chaos wearing a lanyard.

That is why strong print solutions matter. They bring structure to something that is easy to underestimate.

Print Is Part of the Product Experience

A printed piece does not need to be flashy to be important. In many cases, the customer touches the print before they fully experience the product itself.

Think about what print is often doing behind the scenes:

Product inserts explain setup, care, safety, or usage

Packaging cards help protect presentation and reinforce brand quality

Labels identify variations, SKUs, ingredients, or handling instructions

Sales sheets and leave-behinds support buying decisions

Retail tags and display pieces help products make sense on a shelf

If any of those pieces are unclear, flimsy, inconsistent, or late, the problem spills into operations, customer service, and perception. Suddenly a print issue becomes a business issue.

And that is the part people forget. Print is not separate from operations. It sits right in the middle of them.

The Real Cost of Piecemeal Printing

A lot of teams buy print the same way people buy office snacks when nobody is in charge. One person orders what looks decent. Another person orders what is cheap. A third person orders whatever can arrive by Thursday because now everything is urgent.

That usually creates four problems.

First, consistency falls apart. Colors shift, stock changes, sizes drift, and the brand starts looking less organized than it actually is.

Second, reordering gets messy. If specs are not standardized, every reorder becomes a mini detective story. Which version did we use last time? Was this matte or satin? Why is the insert a quarter inch shorter than the old one?

Third, mistakes become more expensive than the original order. Cheap print has a funny habit of becoming expensive after a misprint, a delay, or a rerun.

Fourth, internal teams waste time babysitting details they should not have to babysit. Operations should not need to become amateur print buyers just to keep a product launch moving.

This is where real print solutions earn their keep. They reduce decision fatigue. They document specs. They make repeatability possible. And that is not glamorous, but it is useful.

What Good Print Solutions Actually Look Like

Good print solutions are usually less about novelty and more about fit.

The right setup starts by asking a few boring but very important questions:

What is this printed piece supposed to do?

Who is handling it?

Where is it being stored?

How fast does it move through fulfillment?

Does it need to resist scuffing, moisture, folding, or friction?

Is it a one-off campaign piece or something that will be reordered every month?

Those answers matter more than chasing the fanciest finish in the catalog.

A product insert, for example, does not need luxury stock if it is going inside a shipping box and exists to deliver clean information. But it does need readable type, solid print quality, and dimensions that work with the packaging instead of fighting it.

A retail display card has different priorities. It may need stronger visual impact, better surface feel, and sturdier material because the job is partly functional and partly persuasive.

A warehouse label has no patience for design drama. It needs to scan, stick, and survive.

Different pieces, different jobs. That sounds obvious, but a surprising amount of wasted print budget comes from treating everything like it should be produced the same way.

Standardization Makes Growth Easier

One of the best things a business can do is stop thinking in terms of isolated print orders and start thinking in terms of a print system.

That means standardizing the things that should not change unless there is a reason:

Core sizes

Material choices

Finish preferences

Color expectations

File setup rules

Approval process

Version naming

Reorder triggers

That kind of structure makes life easier for everyone. Marketing gets cleaner brand consistency. Operations gets fewer surprises. Purchasing gets clearer specs. And leadership gets fewer “quick question” emails that somehow turn into a three-day side quest.

It also makes scaling a lot less painful.

When a business grows, print complexity usually grows with it. More SKUs, more packaging variants, more inserts, more promotions, more regional needs, more room for errors. If the foundation is sloppy, growth just multiplies the sloppiness.

If the foundation is clear, growth is easier to manage.

Print Quality Is Not Just About Looking Premium

People sometimes talk about quality like it only matters for high-end branding. That is too narrow.

Yes, good print can make a brand look more polished. But quality also affects function.

Poorly chosen materials can scuff too easily. Inks can feel weak. Text can lose readability. Labels can underperform. Cards can bend when they should stay firm. Finishes can look fine in a proof and much worse after real handling.

Quality, in practical terms, is about whether the piece still does its job once it leaves the box.

That is especially true for packaging and operational print. If the item is going to be stacked, packed, touched, sorted, shipped, or displayed, it needs to be built for reality. Not for a perfect photo under soft lighting.

The Best Print Solutions Feel Predictable

There is a simple standard worth chasing: predictability.

Not exciting. Not dramatic. Predictable.

You want print that arrives when it should, looks like it should, and works like it should. You want reorders to feel routine instead of risky. You want your team to spend less time checking whether the latest batch matches the last one.

That is what good print solutions do. They take something that can easily become inconsistent and make it repeatable.

And honestly, that is the kind of competence businesses remember. Not the fancy sales language. Not the oversized sample deck. Just the quiet relief of not having to worry about whether the printed pieces will show up right this time.

Final Thoughts

Businesses do not need more print for the sake of print. They need the right printed materials, produced in a way that supports the product, the workflow, and the people trying to keep everything moving.

That is the real value of smart print solutions.

When packaging, inserts, labels, cards, and operational materials are aligned, things get easier. Products present better. Fulfillment gets cleaner. Reorders get simpler. Internal friction goes down.

And that is usually the goal. Not to make print feel complicated. To make it feel solved.

Page 2 of 2

Powered by WordPress & Theme by Anders Norén